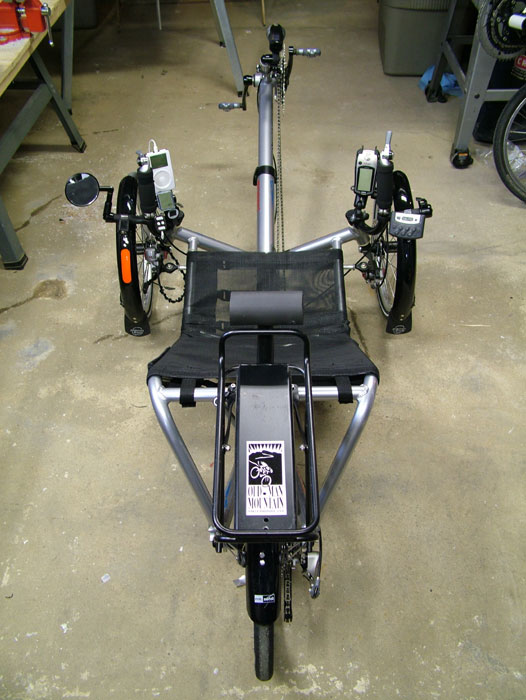
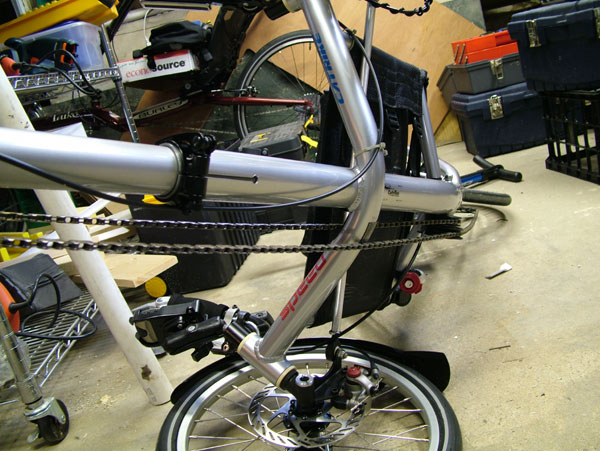
My Catrike Speed all pimped out for the road...
Problem: Too much friction in the drivetrain
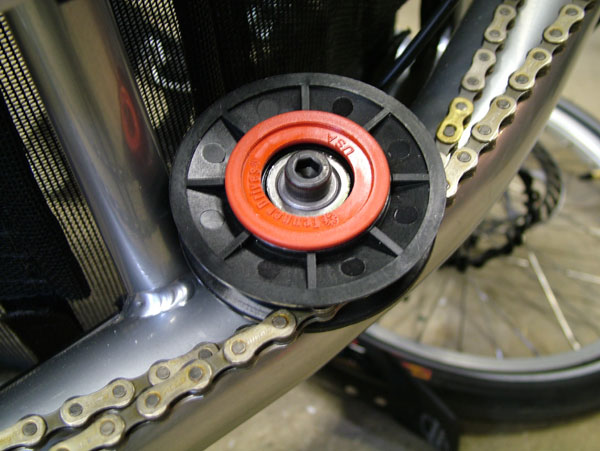
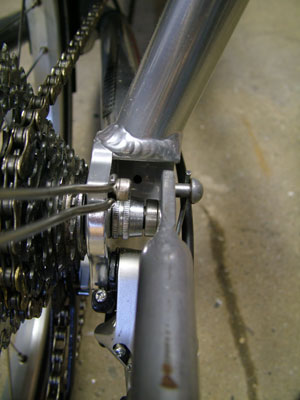
Solution: Eliminate the chain tubes by using a return chain idler
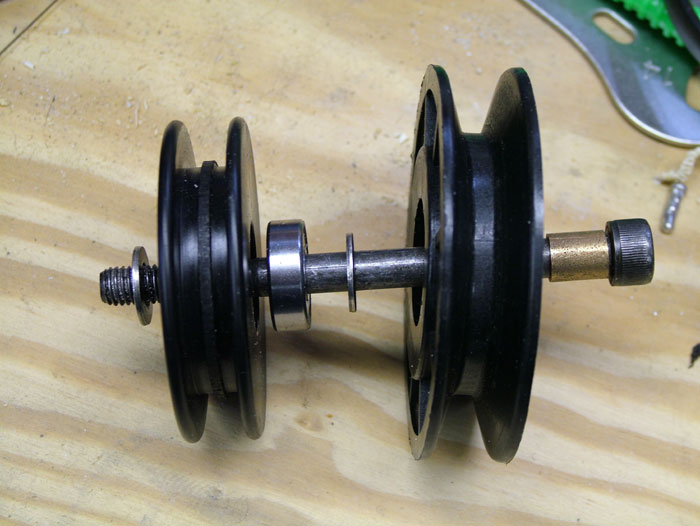
- You can run two idler pulleys off the bolt that holds the one idler in place and eliminate the chain tube all together. This reduces friction in the drivetrain by a huge amount. There is no sense in wasting energy yanking chain through some plastic tubes when your energy is best spent going forward!
- I used the McMaster-Carr idler pulley number item #6234K43. The specs are 3"OD, 0.70" width, 3/8" bore, with cross section A. You'll also need a bronze sleeve bearing. Use McMaster-Carr item # 6391K153. The specs. are SAE 842 unmounte plain bronze sleeve bearing for 5/16" shaft diameter, 3/8" OD and 1/2" length. McMaster-Carr offers excellent service and cheap, fast shipping. They shipped everything to me for $3.50.
- The sleeve bearing is used to take up the gap between the 8 mm bolt that is used to hold the idler pulley on the bike and the 3/8" bore of the new idler pulley. The 5/16" shaft diameter spec. on the bearing is equal to about 7.9 mm which is perfect for use with this bolt. It slides easily over the bolt with very little play once installed.
- Remove the chain from the chain tubes. Remember that there are a some quick removal links if you have an SRAM or Sachs chain. :-) Use a chain tool if you have a Shimano chain. :-(
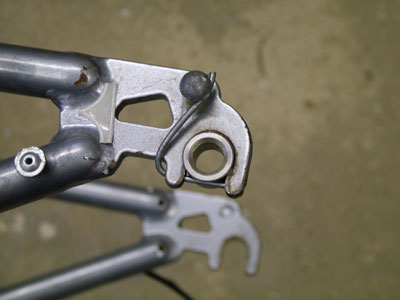
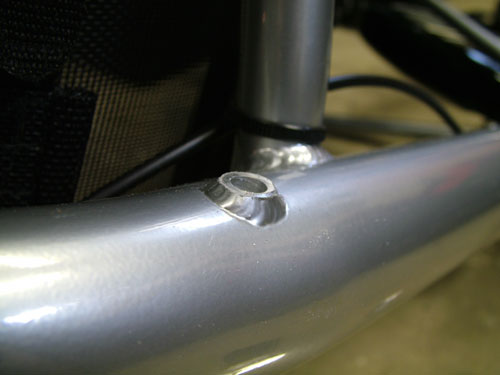
- Disassemble the idler pulley and chain tube assembly from the frame. Keep the loose ball bearing set, nut, bolt and washers handy. You won't need the chain tubes or the chain retainer (angled piece of aluminum)
- Put the brass sleeve bearing on the bolt first. Put your new pulley on next and slide it up so the sleeve bearing fits inside it. Slide one of the washers that came off the stock assembly on the bolt next. Then slide the stock loose ball bearing set over the bolt. Next, slide the stock idler pulley over the bolt. Finally, put one more washer on the bolt.
- Now slide the bolt through the frame. Check to see that there is clearance between the frame and the new idler pulley. If not, install one more washer between the new idler pulley and the stock ball bearning set.
- You'll notice that not enough threads stick out of the aluminum sleeve that slides through the frame. You'll need to fix this by filing some of the sleeve down. I originally wanted to just use a longer bolt but couldn't find one with the proper specs.
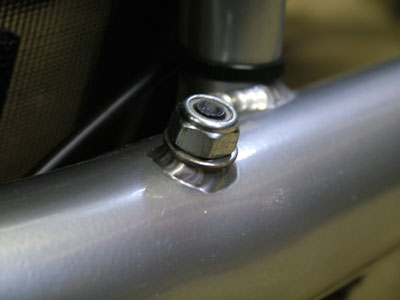
- I used a flat metal file to shorten the aluminum sleeve that comes out of the left side of the frame so that enough threads were exposed for the bolt with the nylon retainer to hold. Be sure to only file the left side (non–drive side) of the frame or you won't have enough clearance for the new idler pulley. Wrap a cloth or something around the main frame tube while you're doing the filing to prevent damage to the paint in case the file slips.
- Tighten the bolt and make sure the idler pulleys run free. It is important for plenty of the nylon part of the nut to grab the bolt threads to hold it in place.
- The drive chain goes on the inside (stock) pulley and the return chain goes on the outside (new) pulley. You shouldn't need the chain retainer. It's winter in Pennsylvania (read: cold) so I haven't thoroughly tested this setup yet. I suspect the chain may pop off from time to time. If it does, I'll make a chain retainer out of some aluminum bar stock. Then I'll have to hunt for a new bolt for the assembly so that there is sufficient space for the chain retainer.
Problem: Stock flag holder in the seat is too swept back
Solution: Build new, custom flag holder out of PVC pipe, some aluminum bar stock and a little nylon tubing clamp. I painted it all up nice with primer and plenty of layers of paint.
Problem: Get wet when it rains
Solution: Slap some fenders on that bad boy
- Two Planet Bike Freddy Fenders (16") for the front (Item #7009) and a Planet Bike Freddy Fender (20") (Item #7009) or Mt. Zefal 20" fender for the rear. You can buy them direct from Planet Bike. They offer free shipping if you're a member of a bicycle advocacy group like Adventure Cycling or something. They are also sold by the piece through HostelShoppe and other places.
- I had some brackets lying around from two Minoura Space Grip handlebar extensions that weren't being used. They worked perfectly!
- Two well nuts, two allen head bolts, some washers and a little bit of PVC was used for this project. I only used one of the metal fender support wires that came with the fender. Using two would be overkill.
- I didn't like how the rear fender looked when it came down to the frame so I made a little extension with some PVC pipe and caps. Paint it up nice and it looks pretty cherry. The cap that's bolted to the fender has the short piece of PVD pipe glued to it with pipe cement. The other end of the pipe simply slides into the cap that's bolted to the frame. That bolt holds the bracket for the flag holder too.
Problem: Sore neck
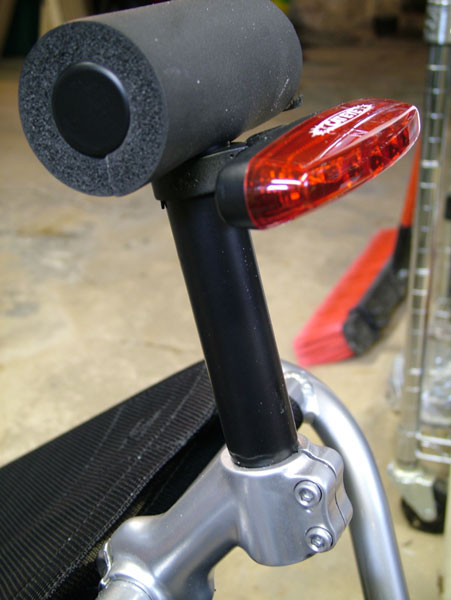
Solution: Headrest on the cheap.
- Handlebar stem
- PVC pipe
- Pipe cement
- File
- Pipe wrap (Lowe's or Home Depot - get the rubbery kind, not the foam kind)
- Primer spray paint for plastic. Some good semi–gloss spray paint.
Here is a picture of the headrest I put together by shopping around at Lowes for just the right PVC pipe pieces. They fit together like a dream and are very lightweight and slightly flexible to take up some road shock that's transmitted through the headrest.
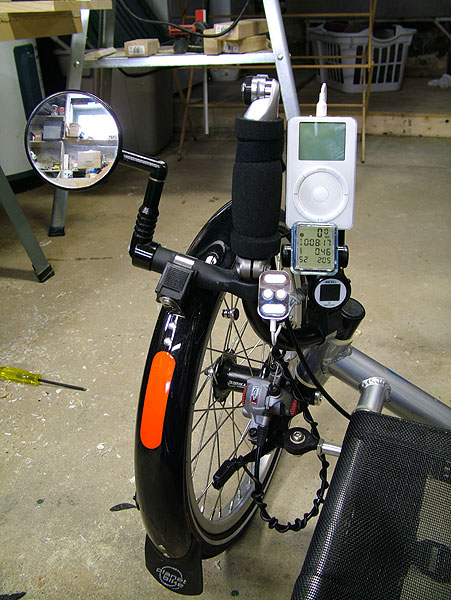
Problem: Nowhere to mount the headlight
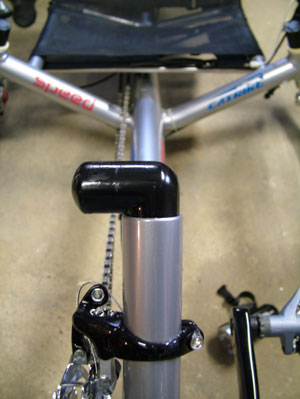
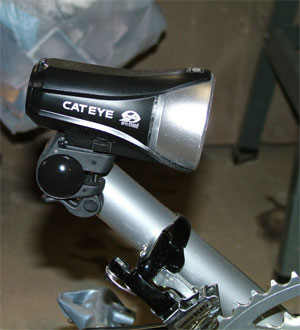
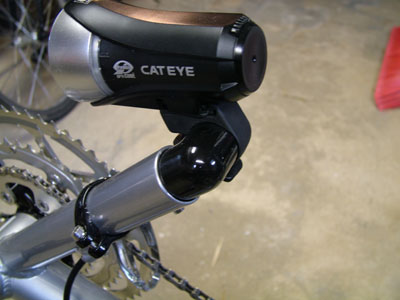
Solution: Custom PVC headlight holder
- PVC pipe
- Pipe cement
- File
- Primer spray paint for plastic. Some good gloss black spray paint.
- Black silicone caulk
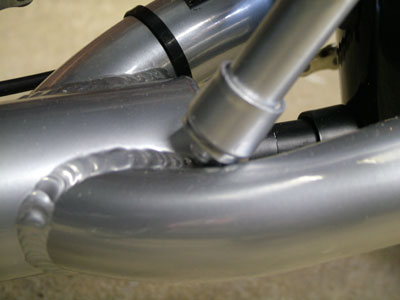
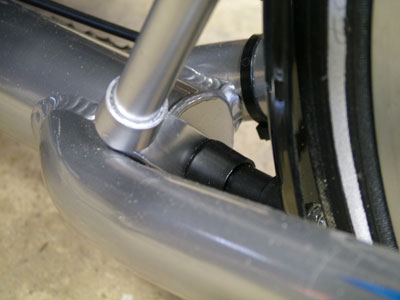
- I pulled the plug out of the top of the derailleur mast.
- I got a bunch of PVC, glued it together, filed off all the text and little knobby things, sanded, primed and painted it. Then I jammed it in the hole and squirted some black silicone caulk in the gap between the PVC and the inside of the tube to keep it from moving and to keep the water out. Works like a champ!
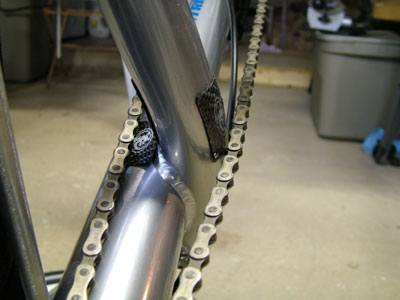
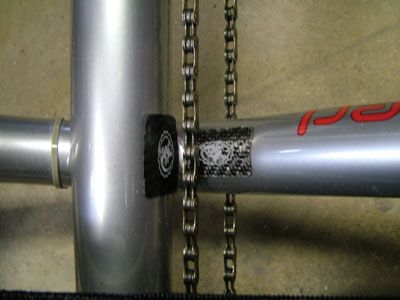
Problem: Chain slaps the frame in some places
Solution: Stick some Lizard Skins thingys on it. Use the Carbon Fiber kind. The foam kind just gets filled up with dirt and grime - you'll hate them if you ever touch them because they'll make your fingers black.
Problem: BOB trailer doesn't like to hook up to the bike easily at all. The bike frame simply gets in the way.
Solution: Gotta be smarter than the trailer.
- The skewer that comes with BOB trailers has two ends. The fixed end (left side) and the removable end (right side). I removed the bolt that's in the removable side and slid the roller off the axle.
- This roller gets permanently affixed to the right side hitch on the trailer. I used a spoke to hold it in place because there isn't enough clearance for the retaining clip. Besides, I lost that clip a few thousand miles ago. See the picture below:
- Put the left side of the trailer hitch on the axle and affix the retaining clip. Then put the right side on by bending the right side hitch outward and slide the roller over the axle. I have the hitch set up so there is some inward pressure exerted by the arms of the hitch so you don't really even need the bolt that holds the roller into the axle. (I met someone on my TransAm bike trip that had the rollers for the axle welded onto the hitch frame and always attached and detached the trailer by stretching the hitch arms outward. He did this because one of the retaining pins fell out and the hitch went into his spokes one time, messing both him and the bike up. He swore by this method.)
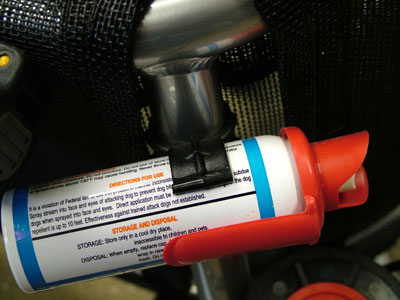
Problem: Gotta have a can of HALT! for feisty canines and rednecks.
Solution: Little HALT! clip under the seat.
- I picked this baby up at Bike Nashbar about three years ago. Clamps under the seat so it's out of sight but never out of mind. Easy reach.
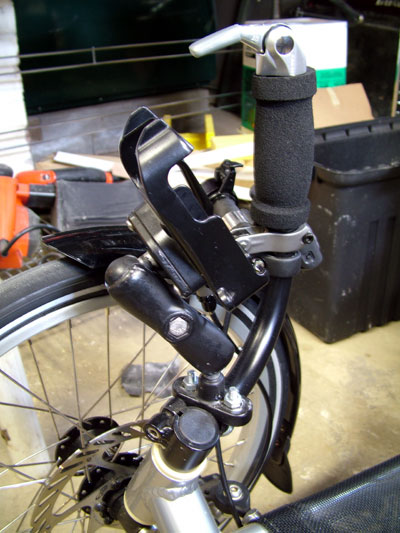
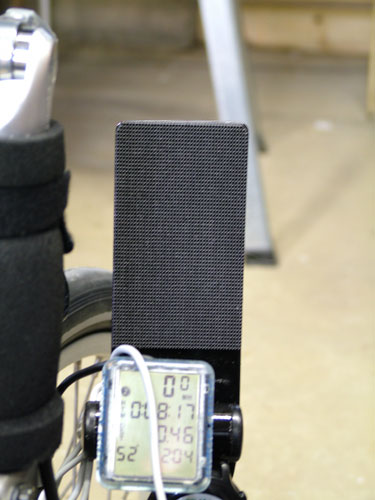
Problem: Need a good way to mount the iPod I use. RAM Mounts doesn't make one for the original 20GB iPod (too thick).
Solution: Make a lightweight, good looking one that has vibration dampening capabilities.
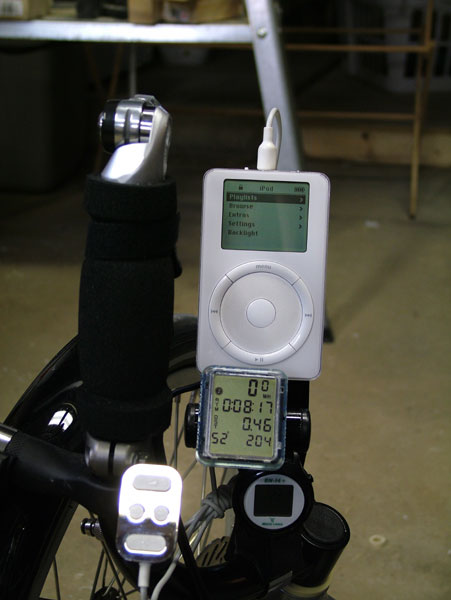
- I fabricated a bracket out of some sheet steel I had lying around. I can't remember what gauge I used but it's strong enough to hold the iPod and is flexible enough to take up some of the vibrations from the road.
- All the sharp edges were filed down and sanded before priming and painting. The face of it has industrial strength Velcro that I picked up at Lowes. I used the hook side on the bracket and the loop side on the iPod.
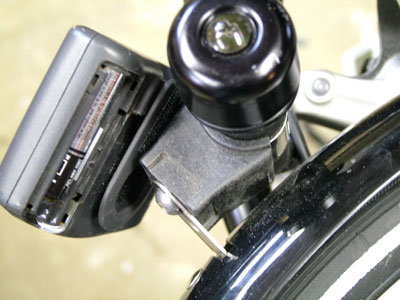
- It attaches to the Minoura Space Grip that I have on the left steerer. The Space Grip also holds the heart rate monitor (bottom) and Planet Bike 9.0 computer (middle). I put the remote control for the iPod on a metal wire that I bent up and coated with PlastiDip. That wire is held in place by the brake lever bolt.
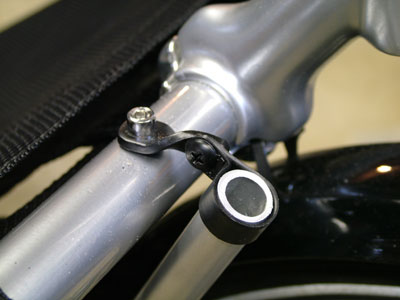
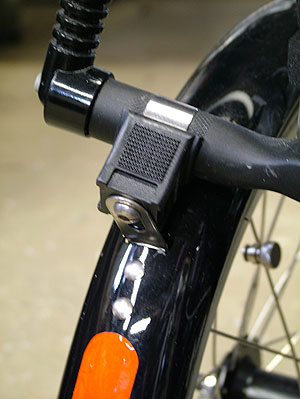
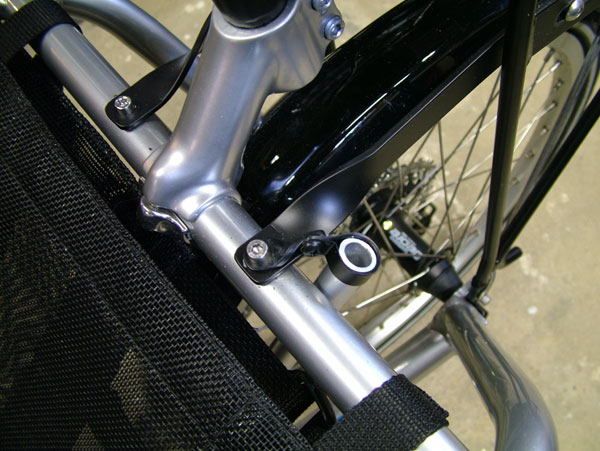
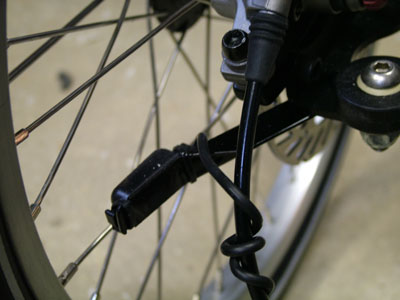
Problem: Need a place to mount the pickup for the computer.
Solution: Make a lightweight, good looking aluminum bracket.
- I fabricated a mounting bracket out of some angle aluminum I had around. it mounts to the bottom of the black metal plate that holds the brake caliper in place. There is already a hole in it ready to go. I mocked it up then sanded, primed, and painted it before installation. It works very well and looks relatively inconspicuous.
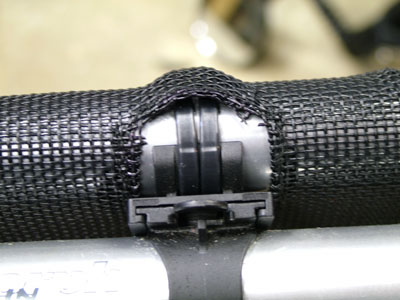
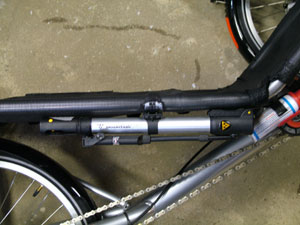
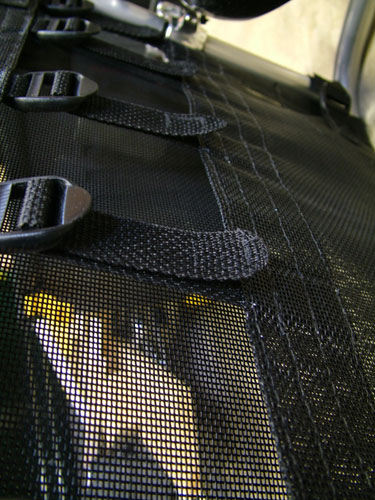
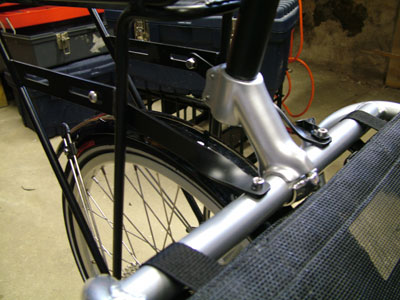
Problem: Seat webbing hangs down and I have no way to put my pump bracket on the frame under the seat.
Solution: Whip out the old sewing machine and grab some thread and velcro.
- For the pump bracket, I cut a hole in the seat and folded the fabric back. Then I sewed it back flat and reinforced it for strength.
- For the seat webbing I just cut the end off the webbing, sewed the hook part of some velcro onto the webbing near its anchor point on the seat, then sewed some loop part of velcro on the tab of the webbing. Be sure to fuse the end of the webbing or it will fray.
Problem: No good way to mount a rack to the back of the bike.
Solution: Make some custom aluminum brackets out of aluminum bar stock.
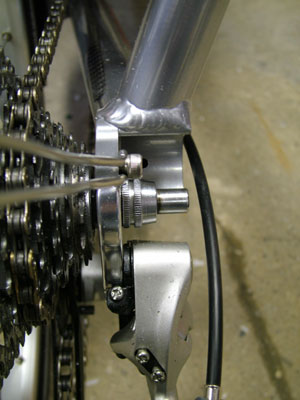
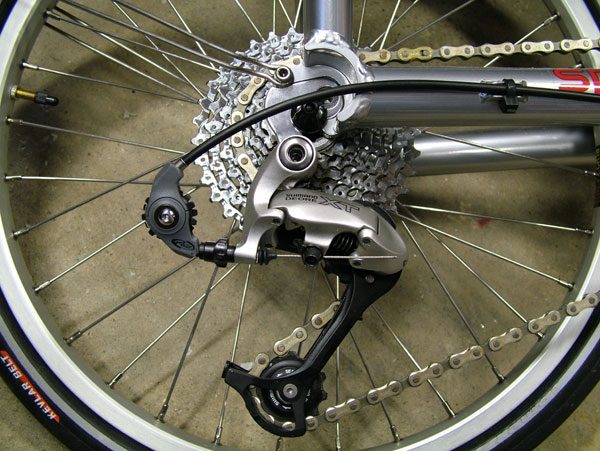
Problem: Too much shift friction in the rear end.
Solution: Avid Rollamajig to the rescue!
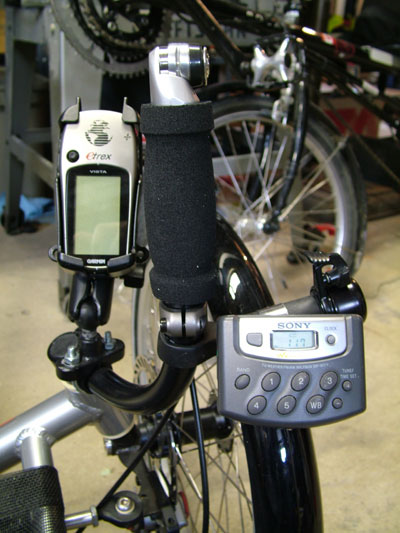
Problem: Need a good GPS mount and somewhere to put my AM/FM/TV/Weather radio.
Solution: RAM Mount for the GPS and some velcro for the radio.